
Mesh Node Placement: How Far Apart Should They Be?
The most common mesh mistake is placing nodes too far apart. Chasing maximum coverage weakens the backhaul link itself, and two badly placed nodes can perform worse than one. There is a calculable standard for this.
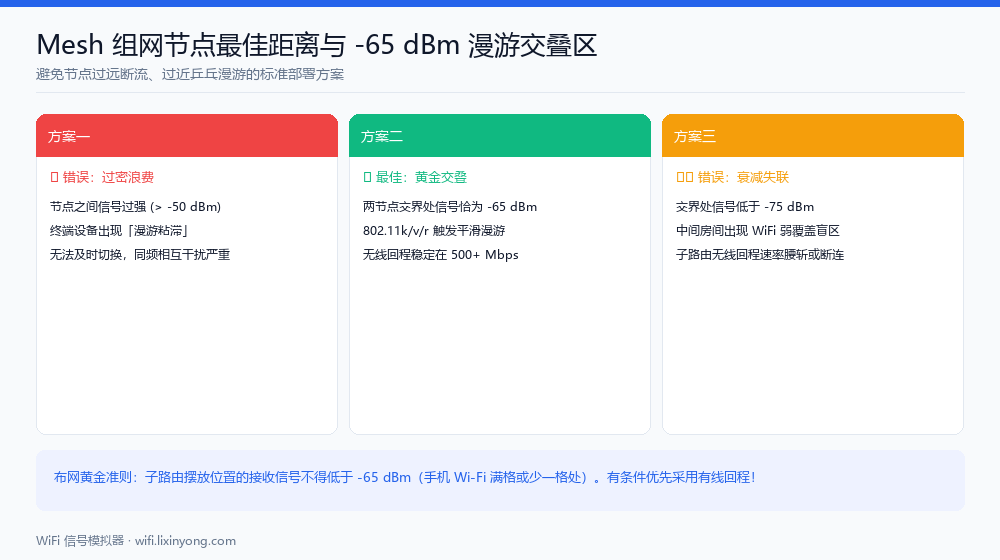
The core rule: overlap no weaker than −65 dBm
Mesh nodes need a strong overlap zone, because wireless backhaul carries all your traffic across that link. The widely used threshold is: each node should measure −65 dBm or better at its neighbour position.
Below −65 dBm backhaul throughput starts dropping noticeably. Below −75 dBm the node still connects and reports itself as meshed, but real throughput collapses — this is the usual cause of "full bars but slow".
What that means in metres
At 20 dBm transmit power, converting the −65 dBm boundary into distance:
| Path condition | 2.4 GHz | 5 GHz |
|---|---|---|
| Clear line of sight, same open space | ≈ 40 m | ≈ 18 m |
| Through 1 brick wall | ≈ 23 m | ≈ 8.4 m |
| Through 2 brick walls | ≈ 13 m | ≈ 3.9 m |
| Through 1 concrete load-bearing wall | ≈ 10 m | ≈ 2.7 m |
| Through 1 concrete slab | ≈ 9 m | ≈ 2.7 m |
Watch the 5 GHz column. Most mesh kits run wireless backhaul on 5 GHz, and with one load-bearing wall in the way the usable spacing collapses to about 2.7 m. That is why "one node per floor" so often fails in concrete duplexes: the slab alone starves the backhaul.
How many nodes do you need?
- Under 90 m², single floor, brick partitions: one router centrally and elevated is usually enough; add a second only if a corner is genuinely weak.
- 120–140 m² single floor with load-bearing walls: two nodes along the long axis, with the overlap landing in the central hallway.
- Duplex or two-storey house: at least one per floor, and place the pair near the stairwell or void so the link goes through the opening rather than the slab.
- Three storeys or more: go wired. Chaining wirelessly to a third hop is rarely worth it.
The deciding factor is not floor area but how many walls of what kind sit on the path. The same 120 m² might need one node with brick partitions and three with concrete shear walls.
Wired versus wireless backhaul
If you can run a cable, always prefer wired backhaul. Wireless backhaul carries two inherent costs: it shares radio resources with client traffic (unless you have a tri-band unit with a dedicated backhaul radio), and each extra hop roughly halves available bandwidth.
With three nodes chained on wireless backhaul, the third typically delivers about a quarter of the main router throughput. If even a single Ethernet run was pre-installed during renovation, using it beats upgrading to a more expensive mesh kit.
Three common mistakes
Putting a node where the signal is already weak
People often place the second node in the worst room — but the node cannot receive well there either, so it just amplifies a weak signal. Place it at the edge of the weak area: the furthest point where the main router still delivers −65 dBm.
Daisy-chaining nodes further and further out
A star topology (every node connects directly to the main router) is more stable than a chain. Unless the hardware explicitly optimises multi-hop, keep every node within direct reach of the main unit.
Ignoring the node own mounting height
The same rules apply as for the main router: raise it, avoid metal, do not tuck it behind the TV. A plug-in node sitting in a skirting-board socket is only 30 cm off the floor and performs noticeably worse.
Simulate before you buy
Mesh kits are not cheap, so test the plan first in the WiFi Signal Simulator. Draw your layout with one AP, turn on the contour overlay to see where coverage falls below −65 dBm, then add a second AP near that boundary and watch how much the coverage share improves. That tells you whether you need two nodes or three.
FAQ
Related guides
Try it on your own floor plan
Draw your layout, place a router and see whole-home coverage in seconds. Free, no signup, nothing leaves your device.
